Paintings of Houses
 |
 |
 |
 |
 |
 |
 |
In the summer of 2001, I was called for commissions for house portrait watercolor paintings for a few houses. These watercolor paintings were completed from August to November. I liked the colors of fall, the red color of the trees made me sometimes feel happy, but sometimes feel sad and wondered.
I drew in location for composition, and took many pictures for reference. This stage in my painting process, I call it the stage of finding the excitement and inspiration. Sometimes I did paintings and color studies plein air, and completed my final paintings in my studio.
The following is a sample painting process in steps.
Painting Step-by-step Demonstration
Step 1: Reference and preparation
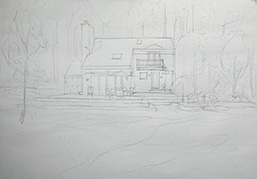
Next, I made several sketches of the location. See the top sketch for the composition I selected as the basis for the painting. I then took digital photos to capture the details for reference later as I work in my studio.
Using the sketch and the digital photos, I made a detailed pencil drawing.
After I had finished with the drawing, I mixed paint colors and made small paint samples on another sheet of paper to determine the colors I wanted to use for the portrait.
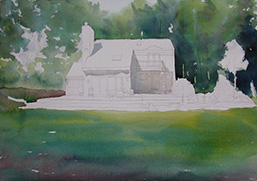
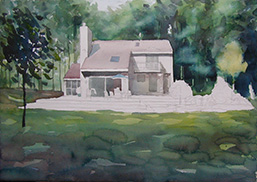
Step 2: Painting background
First I painted the shapes of cast shadows in the house area, then I started painting in the background and front yard with good amount of water, with an one-inch flat brush. You may see that I left some shapes untouched. I have planned on the process for the painting. While these areas are still wet, I blended some darker color to the shadow areas of the trees, also some blue and red colors to the front.
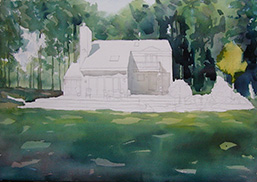
Step 3: Overlaid wash
After the paper was dried, I painted a dark color into the trees behind the house to create details and space. I also painted a yellow color to the small tree at the right as the base color.
For the front, I used a flat brush to apply another layer of wet wash to suggest for the shadows from the trees. This step has established the balance for the value contrast and composition.
Step 4: Start working on the house
Now I moved my attention onto the house area. I started working from the big shapes. I planned on layer by layer manner. At each layer, I evaluated the balance taking every colors on the paper in consideration, and determined how the additional color will contribute to the new balance.
I also painted the tree on the left at the front. This dark, small tree at the foreground is not only adding a balance to the whole picture, but also created a new dynamic space to the front.
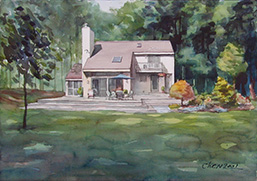
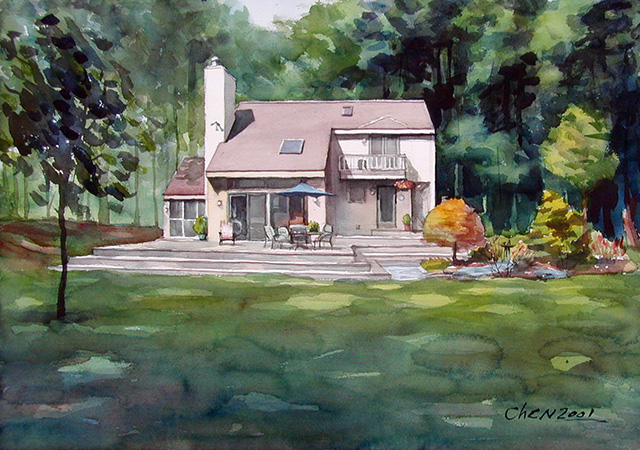
Step 5: Finish with details
I continued to develop the details to the house and working on the steps. I also introduced some dark value to the cast-shadow on the roof. Then I started to work on the garden. First I washed the bushes and the orange-color tree, then come back to add dark value for shadows after the areas became dried.
As the final touch, I added the details to the trees at the background to give it a finish look and consistency to the whole painting.