Painting a Watercolor Portrait of a Girl

Brushes and Colors
Brushes:
Number 14 round sable
Number 6 round sable
1/2-inch flat sable
1.5-inch flat sable
Watercolor paint : red, blue, yellow, burnt umber, burnt sienna
Paper: Arches Cold Press 140 lb.
Drawing
A child is innocent, tender and sweet. Here is a demonstration of my method of painting a watercolor portrait of a child.
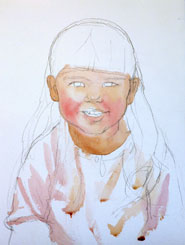
For a portrait painting, I usually start with a good pencil drawing. This is the step where I plan the composition, sort out the perspective, relationships, proportion and balance, size and distance. A good drawing is a good base for a painting; it can give you more confidence, so take as much time as you need to in this step.
Start the first wash
I used a number 14 round brush to start the wash from the top of the forehead and moved down. As I washed down to the chin, I added more red to my brush. By changing the colors for different parts of the face and neck in the wash, I created a soft, blended base of colors for this painting.
After waiting few minutes to let the watercolor paper to absorb the water, I started painting the garment.

Painting the hair
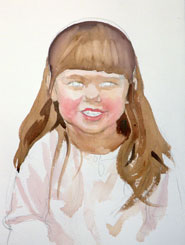
Once the paint on the face was mostly dry, I started again from the top with burnt sienna, and then introduced some burnt umber for the hair on the forehead, still using the same number 14 round brush.
Quickly, I cleaned and dried the brush, and lifted off some color from the hair on the forehead by absorbing the water and color into the brush. This technique creates a softer and more natural look than leaving these areas white in the first place.
Next, I added a thin layer of glaze on the face and the hair on both sides, to form depth and dimension.

Background
The background is also an important part of the painting. It should work with the rest of the painting to represent the personality of the subject.
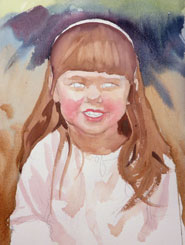
With a one and half inch flat brush, I first applied clean water to the background area, then started the yellow wash from the top of the paper, changing to blue, then to burnt umber for the lower part. While the paper was still wet, I mixed burnt sienna and blue, and blended that into the area behind the head in the background.

Add dark colors
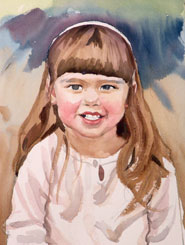
At this point, I like to add darker-value colors to the painting to further define the forms. I started with the hair, moved to the eyes, the corners of the mouth, then the eyebrow areas. I mixed red and burnt umber for the areas around the mouth and nose. For the outer side of the face, I applied a little blue as these areas reflect the cool colors from the surroundings. This was also a good time to add a darker color to the garment.
