How to Paint a Bagel in Watercolor
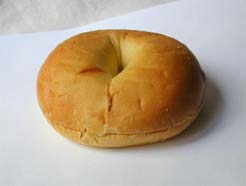
Preparation
Materials:
9" x 12" cold-press watercolor block
#2 HB pencil
#12 round Chinese brush
watercolor paint: Red, Yellow, Blue and Burnt Umber
In this demonstration, I will capture the feel of the soft surface of a bagel, the beautiful colors and very fine details. We also need to keep in mind three-dimensional space as the front of the bagel is closer to us.
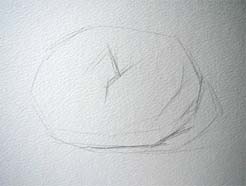
Rough Sketch
With a #2 HB pencil, using straight lines only, outline the most essential elements accurately but loosely. Remember, this is only the first step of the process and do not overdo the drawing, otherwise we could lose the spontaneity and excitement of watercolor.
Sometimes we skep this step and not doing the pencil sketch on the watercolor paper, however, we do it with light watercolor paint, or do it in my mind.
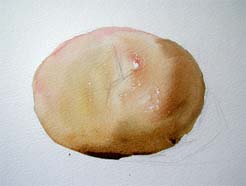
First Wash of Color for the Bagel
First, to set the tone of the painting, mix red with a fairly large amount of water. Starting from the top, brush the watery red over 1/3 of the area. Next, add a little burnt umber to the tip of the brush, and continue to cover most of the remaining area of the bagel. Add even more burnt umber and paint another layer on the darker areas to define the shadow. This establishes the basic values of the colors in the bagel. Let dry.
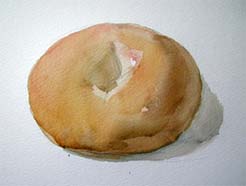
Building up the Value
Mix a little yellow with red and burnt umber and proceed to wash this over the first layer to enrich the color. While the paint is still wet, go on to Steps Four and Five.
Two things to keep in mind: when you add a new layer, this is not to repaint, but is to add a little pigment where the first layer did not have enough, much like adding 4+1=5. Sometimes a very light color coat will make a large difference. The second thing to remember is to only use 2/3 of the brush. Do not press your brush down all the way, it will destroy the first layer of paint.
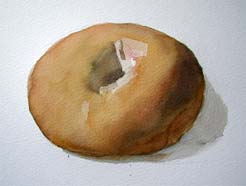
Values Finished
Add more burnt umber to define the shadows. Now the values and overall color definition are completed.
Many of us move into the small area, and stay there too early. Keep your mind and eyes on the balance of the color temperature and value study in the painting process. This is important. We are creating a piece of art, a watercolor painting, not a copy of the subject.
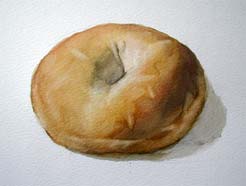
Removing Color to Create Details
One of the most important techniques in my watercolor painting is taking (removing) color off the paper. While the second layer of paint is still wet, dry the brush, and use the tip of the brush to remove some of the paint. Move the brush very slowly and carefully, drying the brush frequently. Take the paint away from the areas you want to appear as highlights.
Why we want to paint the color on watercolor, then partially remove it? It is all about the soft texture effect and bagel's unique material feel.
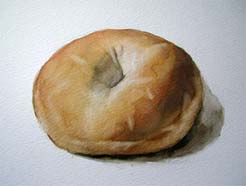
Adding Cast Shadow
Mix blue color with burnt umber then paint in the area of the shadow cast by the bagel on to the table. Let it dry.
Remember this is not the final step of the painting, let your impression and take the lead, keep your focus on the overall impression, overall color temperature, value build-up. Bagel has different feel of the surface texture and material from a yellow apple.
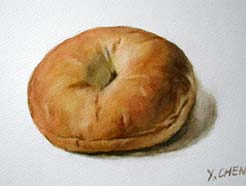
Final Touches
Use red and burnt umber to add more details, defining the creases, the line where the bagel has been sliced, and deepening the shadow in the hole. In this step, I use more water so that the brush will not distort the previous layers of colors. This step is the most fun - I finally make the painting complete. My painting now looks like the picture I had in my mind before I did the drawing.
