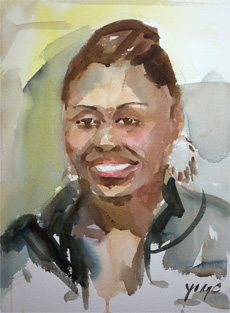
A 20-minute watercolor portrait painting


Drawing and first wash
To start this quick watercolor portrait painting, I used a pencil to do a rough drawing to outline the layout and define the main elements in the painting.
Though using a pencil to do drawing is only an option for an artist to start a watercolor portrait painting. This is called a "under drawing" step. When I use a pencil to do the under drawing for my portrait, I will not erase the pencil later. The pencil will be part of the final artwork, though most time, you may not notice there are pencil marks there.
For a 20-minute quick watercolor portrait painting exercise, I will spend 5 minutes to observe and direct my model, 2 minutes for drawing and sketching. Then I will start the first wash. Usually after the first few minutes, the mental picture of my portrait painting would become very clear. I could see what direction I am pursue in my painting.
I used a 1.5 inch flat brush to start the first wash. I started from the background wash with yellow, and used burnt umber for the face. Then I mixed a blue gray color for the dress. As I washed from the top down, I added red color into the mix.

Add tones and color to shape the balance
Then I used a #14 round brush to do the second layer. This time I started from the hair from the top of the head, then I use the same brown color for the shades and shadow areas on the face. This would push the balance to the deeper level.
Next I added the cast-shadow to the left side in the background.
After I had the tones and color balance settled, now I further defined the shapes and darker area of the eyes, nose, mouth and others. With a another fine-toning touch and adjustment to the color temperatures, this quick water color portrait painting finished in about 20 minutes.
